Getting started with KNEO Pi
To get started with KNEO Pi, you will need the following:
You can configure your KNEO Pi in two ways: either as an interactive computer with a desktop or as a headless system accessed remotely over the network. For a headless setup, no extra peripherals are needed. During the operating system installation, you can preconfigure the hostname, user account, network settings, and SSH access. However, if you prefer direct use of the KNEO Pi, you will need these additional accessories:
- A HDMI display
- A micro-HDMI cable to connect the display to KNEO Pi
- USB-A keyboard and mouse
Power Adapter

Info
- Recommended power supply (voltage/current) : 5V/2A USB-C power adapter
- You can use any high-quality power supply that provides the correct power mode.
- The USB-C port is for power only and does not support data communication.
Plug your power supply into the USB-C port on KNEO Pi.
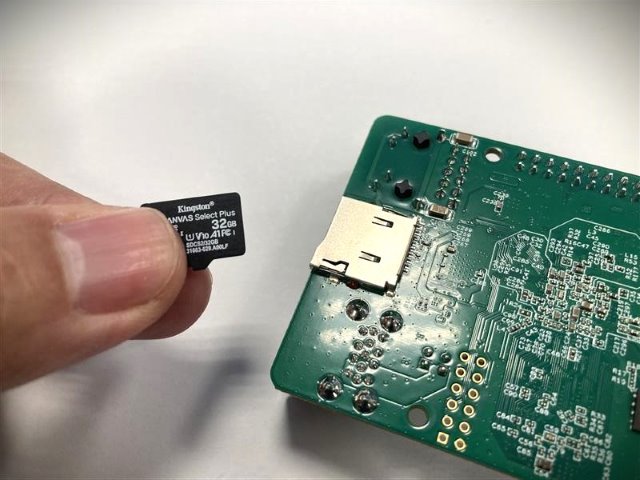
Boot media - microSD card
Info
- This documentation focuses exclusively on the usage of microSD cards.
- The minimum required SD card size is 16GB.
- We strongly recommend avoiding the use of SanDisk SD cards with KNEO Pi, as they have a high incompatibility rate and may cause booting issues.
- Also, if your device fails to boot, consider switching to an SD card from a different brand
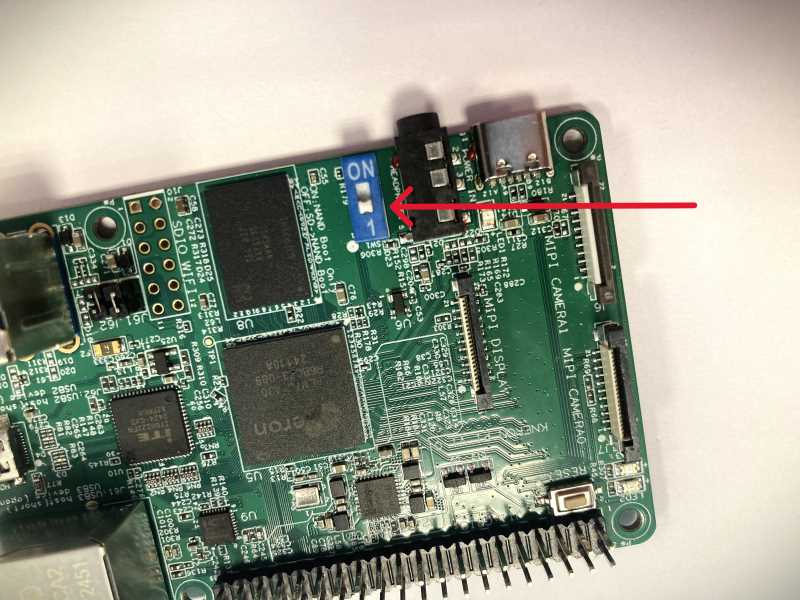
KNEO Pi supports both external microSD cards and an onboard 4Gbit flash as boot media. You can boot the KNEO Pi from an operating system image on a microSD card, which also provides ample space for development tools and software installations.
A DIP switch enables you to toggle between these two options. Adjust the switch as shown in the following image.
Keyboard and Mouse
You can use the USB ports on the KNEO Pi to connect a wired keyboard or mouse. If you need to connect multiple devices, a USB hub will be required.
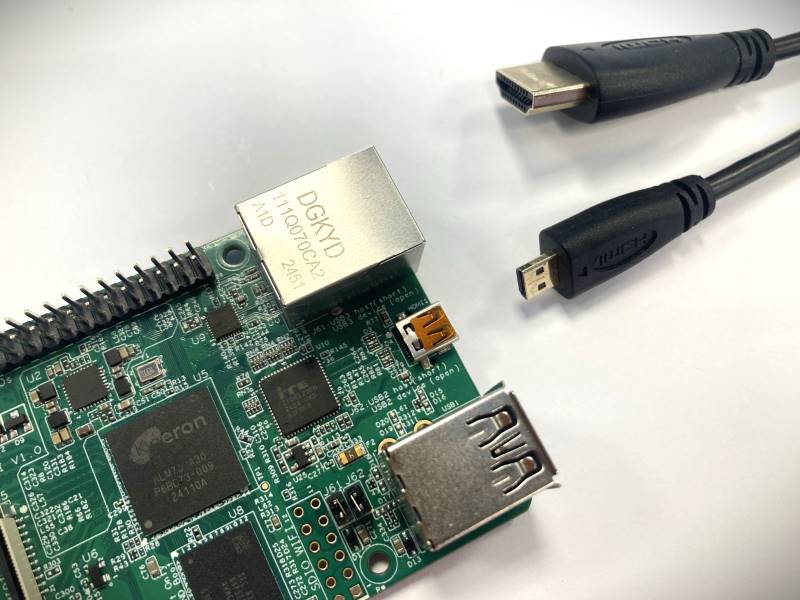
Display
KNEO Pi has display connectivity through micro HDMI.
Info
Most displays do not have a micro-HDMI port. However, you can use a micro-HDMI-to-HDMI cable to connect the KNEO Pi to any HDMI-compatible display.
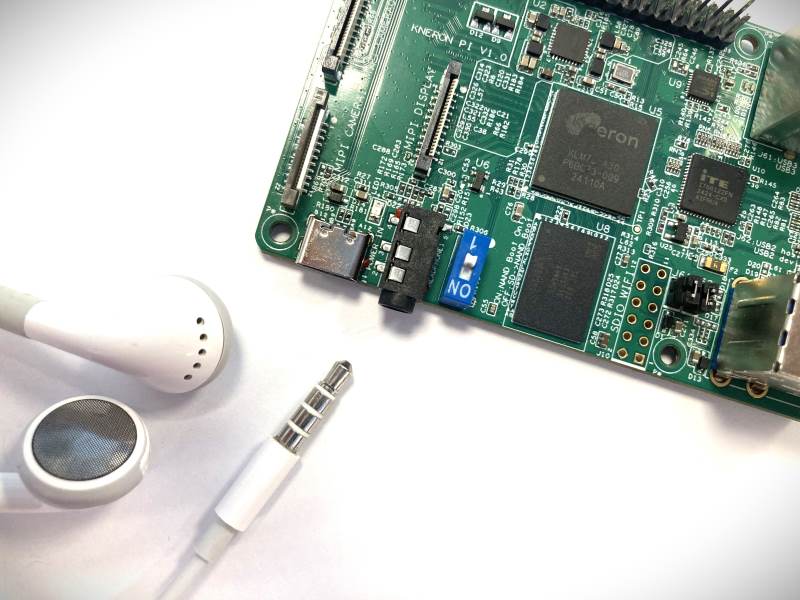
Audio
KNEO Pi features a 3.5mm TRRS jack that supports both audio output and microphone input.
Warning
- KNEO Pi 3.5mm audio jack supports CTIA (AHJ) standard only.
- Not compatible with Apple EarPods 3.5mm due to Apple's proprietary circuitry.
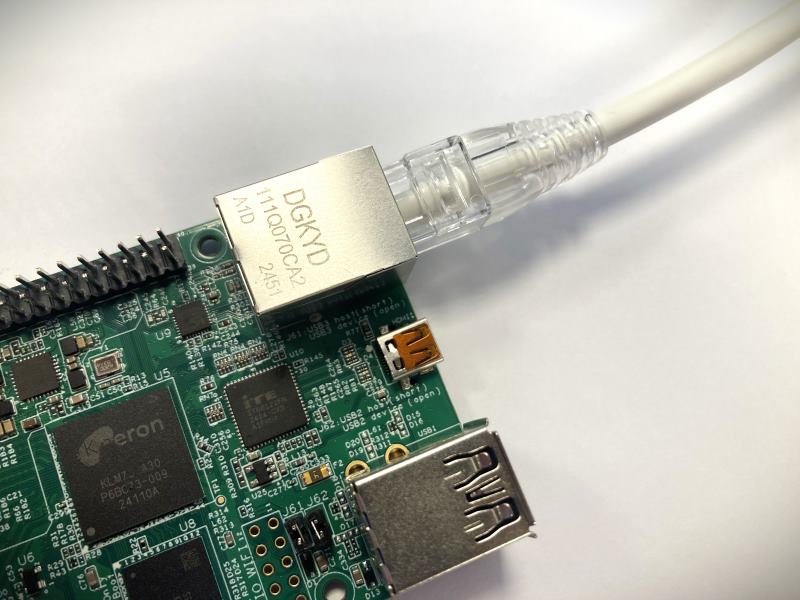
Networking
Accessories
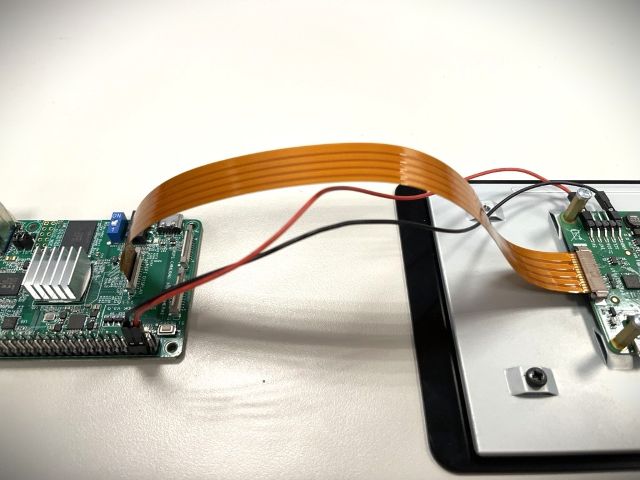
MIPI Display
In addition to standard HDMI monitors, KNEO Pi also supports displays connected via the MIPI DSI (Display Serial Interface). MIPI displays are ideal for compact, high-performance, or embedded applications. They offer high refresh rates, lower power consumption, and use slim, flexible cables.
The following module has been tested and is supported out of the box with built-in drivers:
-
Raspberry Pi Touch Display : A 7-inch display with 800x480 resolution and capacitive touch input, connected through the MIPI DSI port.
- Connect FPC cable between LCD and KNEO Pi
- Connect LCD power pin (5V) and GND pin to KNEO Pi 40-pin header
Info
22-Way to 15-Way FPC cable is required. Refer to Raspberry Pi Official site for more details.
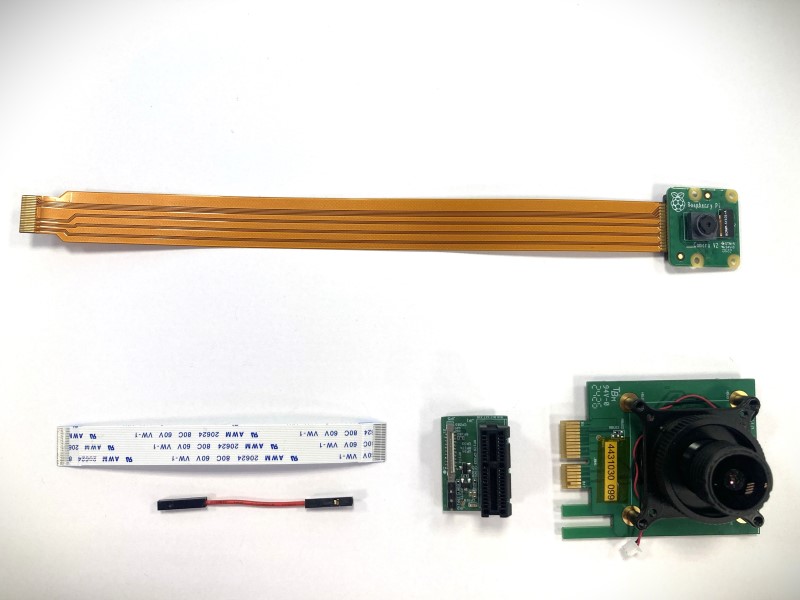
Camera
KNEO Pi supports a wide range of camera accessories to enhance its functionality in multimedia and AI applications. There are two primary types of camera connections:
-
USB Webcam: Any standard USB webcam can be connected to the KNEO Pi for basic image and video capture tasks. These devices are plug-and-play and supported natively by the operating system.
-
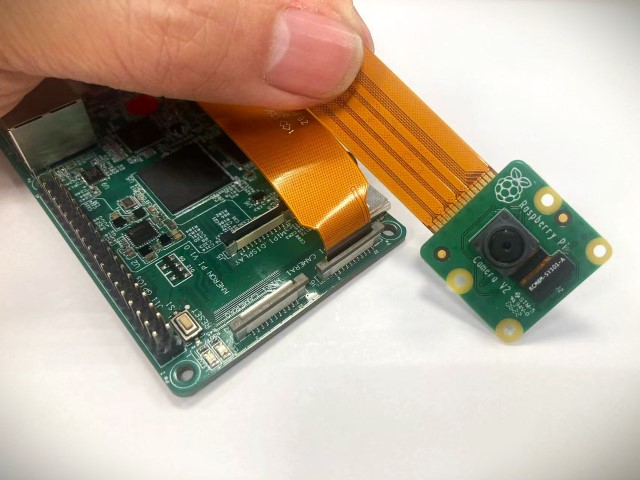
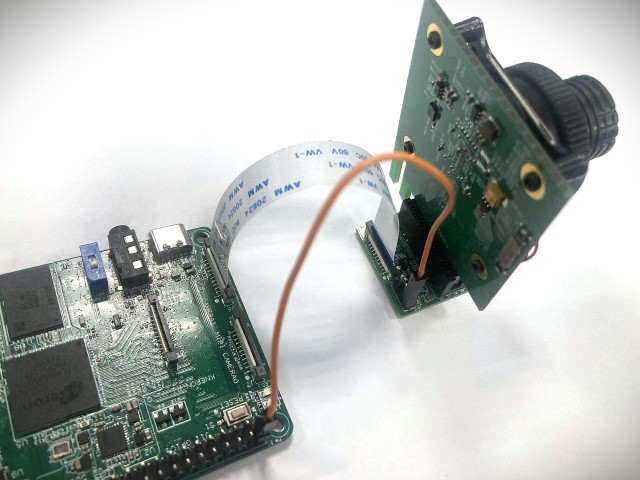
MIPI Camera Interface: For advanced use cases requiring high-quality image capture, the KNEO Pi also supports cameras connected via MIPI interface. The following sensors are supported out of the box with built-in drivers. Refer to the following pictures for detailed guidance on how to properly connect the camera module to your KNEO Pi.
-
Raspberry Pi Camera Module v2 : The module has a Sony IMX219 8-megapixel sensor.
Info
22-Way to 15-Way FPC cable is required. Refer to Raspberry Pi Official site for more details.
-
KNEO Pi Camera Modules: Custom modules designed specifically for the KNEO Pi, offering optimized performance and additional features for AI and video streaming tasks. Modules with Sony IMX678 8-megapixel sensor and OMNIVISION OS05A10 5-megapixel sensor are available.
Info
For purchasing information on the KNEO Pi Camera Modules, please contact us through the details provided in the Getting Assistance section.
-
To use these MIPI cameras, connect them to the appropriate MIPI-CSI interface on the KNEO Pi and ensure the relevant drivers are loaded. Refer to the sensor application example for further information.